📔
Hubflo Quick Start Guide
Go to Hubflo
  • Hubflo - Quick Start Guide
  • 1/ Get ready
  • 2/ Basic setup
  • 3/ Beta launch of your portal
  • Maximize client engagement
  • Video tutorials
  • Knowledge base
  • More
    • Learn more about the portal
      • â˜‘ī¸Tasks
      • đŸ’ŦClient Messaging
      • đŸ–‡ī¸Embeds
      • 🔔Client Portal Notifications
      • đŸ•ĩī¸â€â™‚ī¸Testing the portal
    • 👀Projects
    • 📩Connect your email/calendar
    • 📱Install the Hubflo apps
    • 💰Billing
      • â„šī¸Set up your personal and business info
      • 💰Connect Stripe to collect payments
      • 🔗Connect to Quickbooks
      • 🔗Connect to Xero
      • Advanced
        • 🔁Recurring invoice/Subscriptions
        • 🛒Create your catalog of services
    • đŸ› ī¸Setup custom fields
Powered by GitBook
On this page
  • 1 - Create custom fields
  • 2 - Using my custom fields
  1. More

Setup custom fields

PreviousCreate your catalog of services

Last updated 2 months ago

Custom fields provide a unique flexibility to enrich your information on contacts, companies, projects, and tasks, making them more detailed and tailored to your specific needs!

In this article, you will understand how to create and use custom fields on Hubflo!

Let's go 👇


1 - Create custom fields

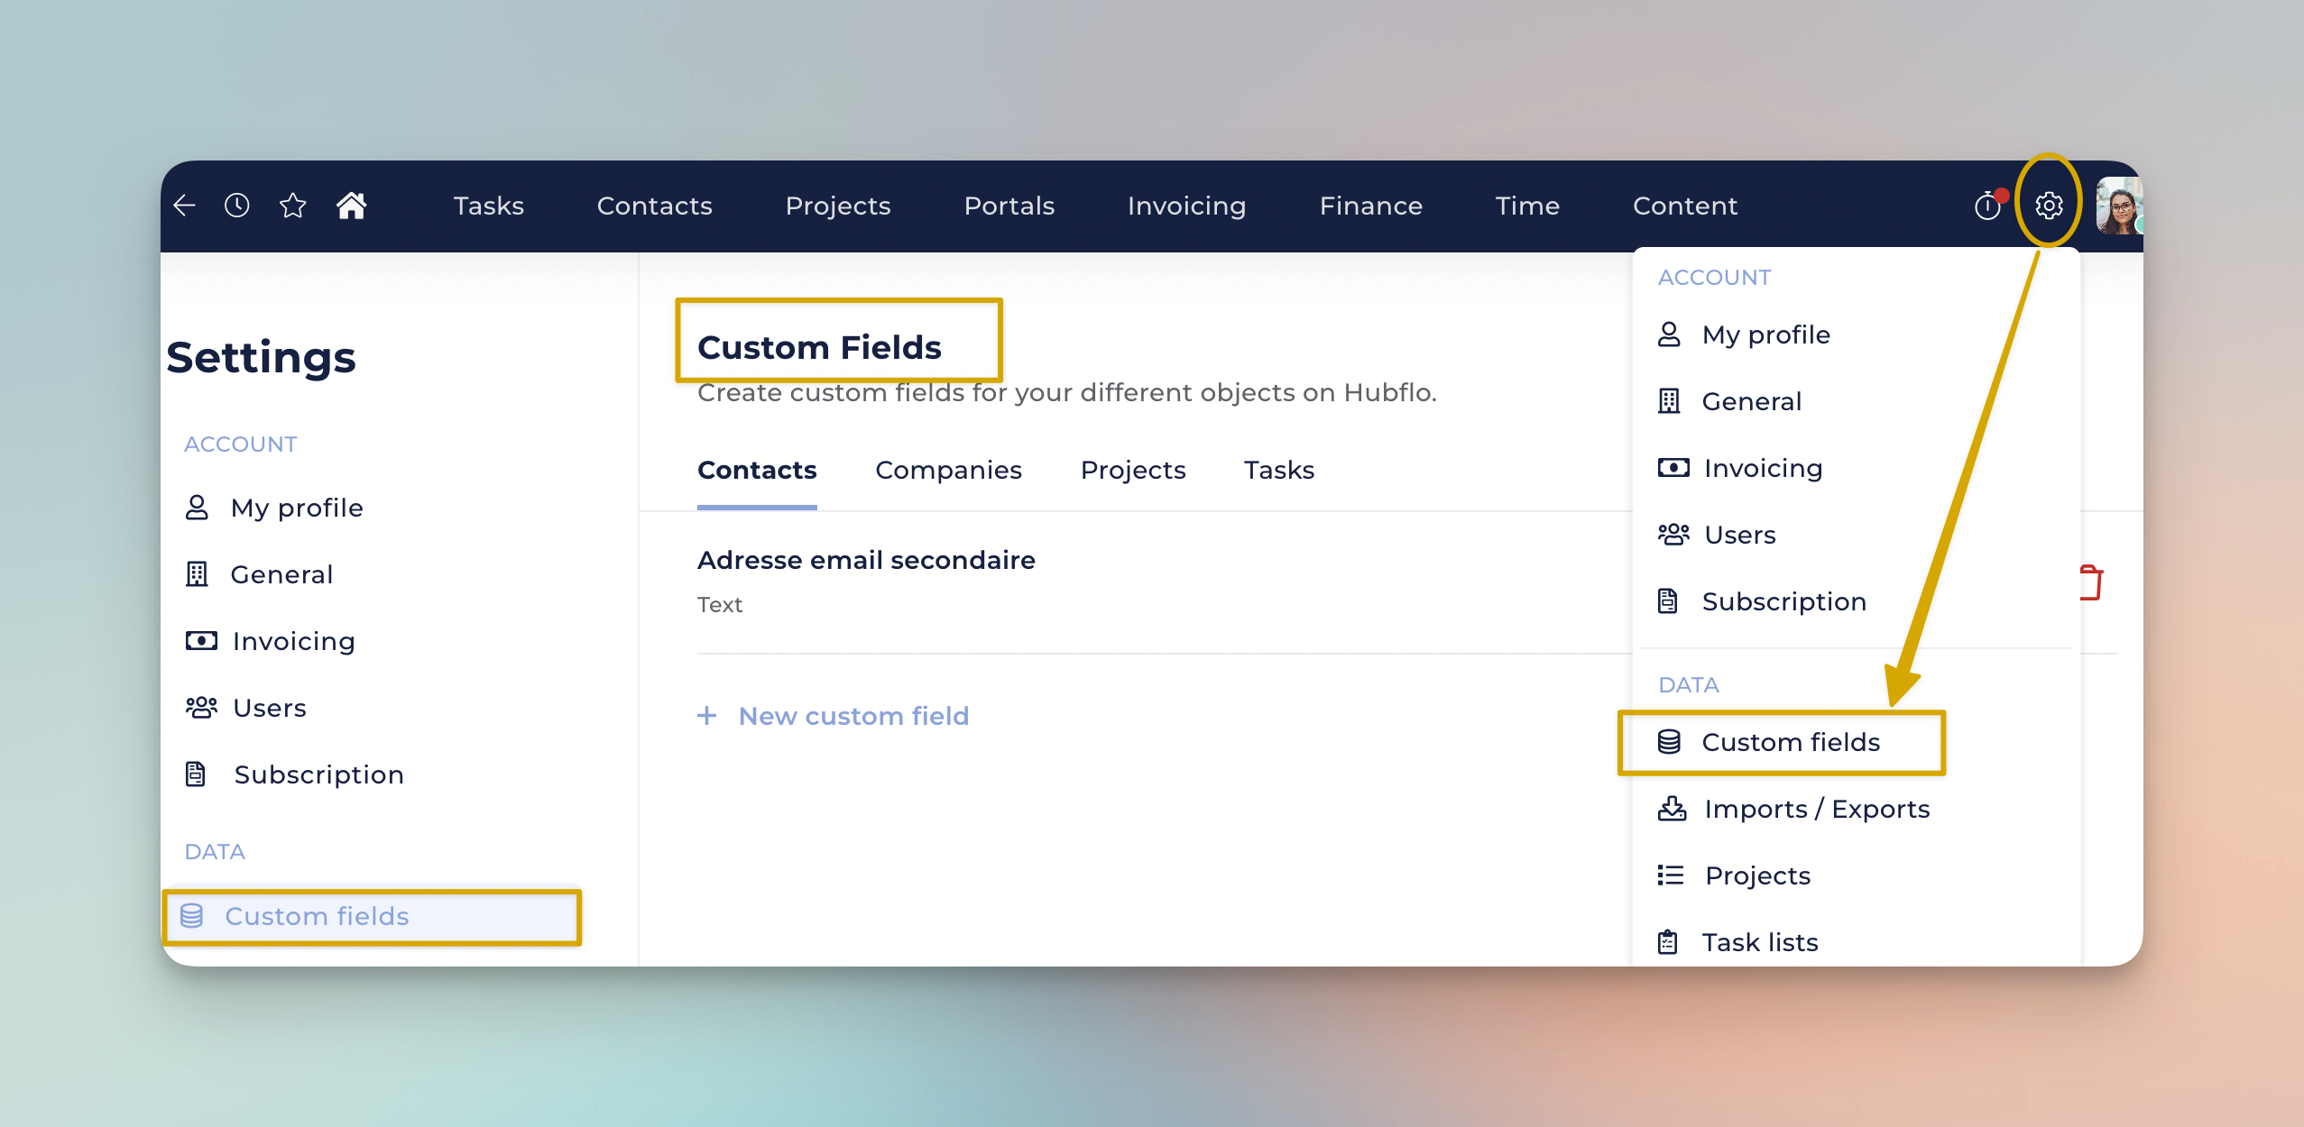
  • From your settings, go to the 'Custom Fields' section, then choose the category: contacts, projects, notes, or tasks.

  • Select '+ New Custom Field', then give it a title and choose its type: text, integer or decimal number, date, or list.

2 - Using my custom fields

Here, we have added the custom field: Secondary email address.

Thanks to this custom field, you can now add a second email address to your contacts!
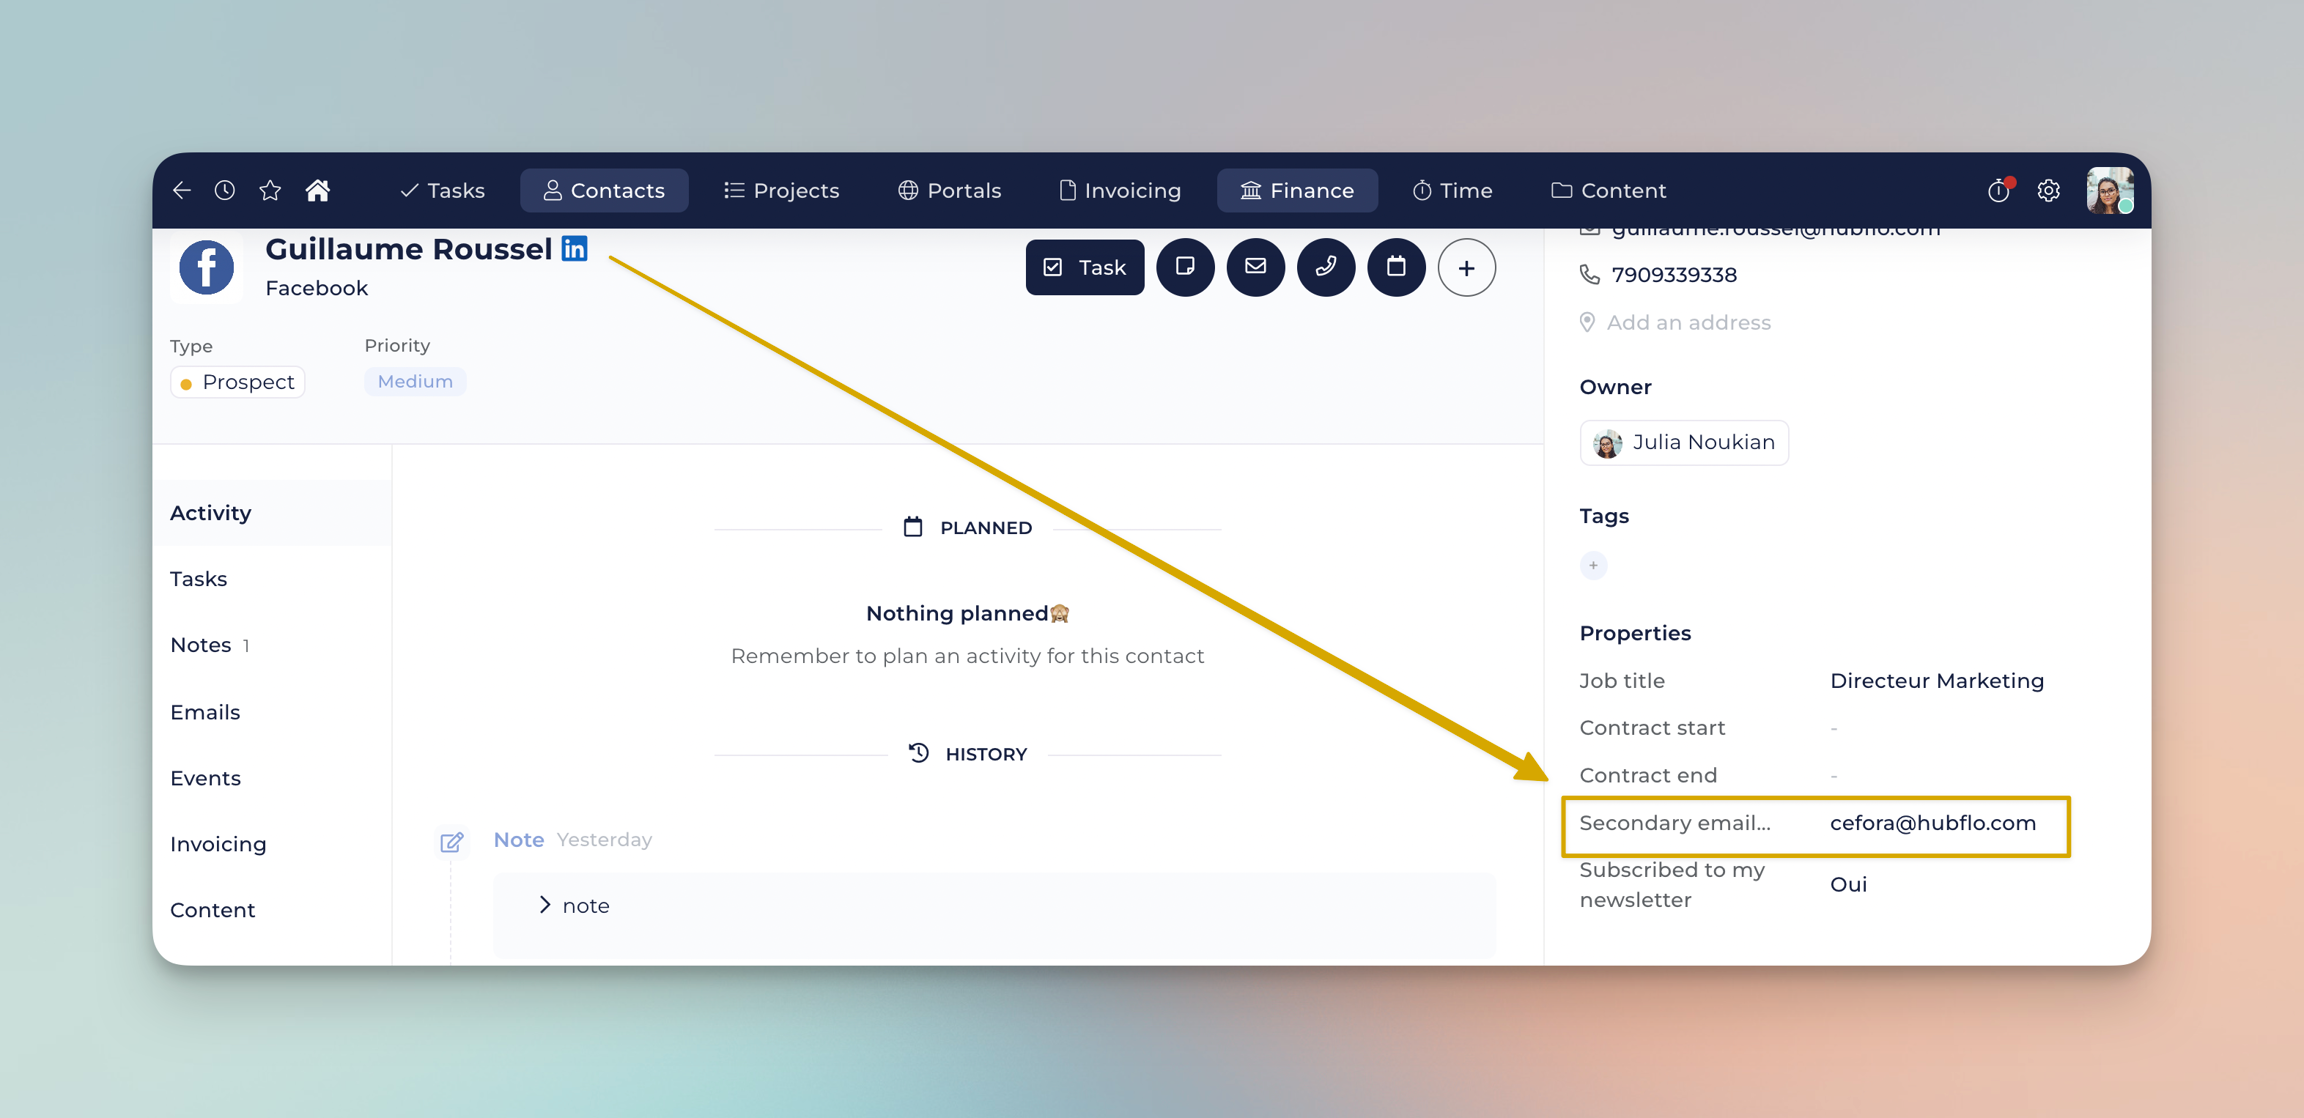
💡 You can also add other custom fields to your contacts such as :

  • The job title

  • The language used by the contact in the case of an international company 🙂

Or any other element that resonates with your needs!

đŸ› ī¸